Easter Baking

Marbled Deviled EASTER Eggs | Artificial Dye-free

Try our Marbled Deviled Egg recipe this Easter, a festive colorful holiday classic that is artificial dye-free. These naturally colored marbled eggs are a healthy alternative to all the candy and treats during Easter celebrations.

INGREDIENTS

Color Kitchen color packets
12 hard boiled eggs
½ cup mayonnaise
1 tsp sea salt
Black pepper, to taste
Chives, to garnish

DIRECTIONS

Carefully cut each egg in half lengthwise. Remove the yolks with a spoon and add to a large mixing bowl.

Add Color Kitchen color packets to small jars. Into each jar, add 1 teaspoon of water, and mix to dissolve. Once the color has dissolved, add ¼ cup of water into each jar.

Add 2 egg white halves to each color jar, and let soak for 1-5 minutes, depending on desired concentration of color.

Remove eggs from the color, and place on a plate lined with paper towels to let excess dye dry off.

Add mayo, salt, and pepper to the egg yolks, and use a fork or a mixer to whip the egg yolks until a smooth mixture is made.

Either pipe or spoon the egg yolk mixture into the egg whites.

Garnish with chopped chives.


Easter Egg Cookies | Natural, Dye-free Colors

natural color easter egg cookies

MAKES 18-20 COOKIES
Prep Time: 30 minutes

Ingredients

COOKIES  
½ cup unsalted butter, softened
½ cup granulated sugar
1 tsp vanilla extract
1 large egg, at room temperature
1 ¼ cups all-purpose flour
¼ tsp baking powder
¼ tsp salt

ICING
1 Color Kitchen Frosting Mix with Sprinkles (color of your choosing)
1 Color Kitchen Pink, Orange or Yellow Color Packets (additional colors of your choosing)
3 tbsp milk or milk alternative

natural food colors icing

Directions

COOKIES

In a stand mixer with a beater attachment, beat together the butter and sugar on high speed for 3-4 minutes.

Add the eggs and vanilla to the butter mixture and beat on low speed until combined.

Add the flour, salt, and baking powder and beat until all ingredients are combined in a smooth dough.

Form the dough into a disk and wrap with plastic wrap.  Place in the fridge to cool for 1-2 hours.

Preheat the oven to 350 degrees and line a baking sheet with parchment paper.

When the dough is done chilling, roll it out into a ½-inch thick sheet.  Cut out cookie shapes using egg-shaped cookie cutters.

Place the cookies on the baking sheet and bake for 10 minutes.  Let cool for at least 15 minutes before decorating with icing.

DECORATE

Empty the powdered sugar from the frosting mix into a bowl.  Add the milk and mix until smooth.

Spoon 3 tablespoons of the plain icing into a piping back with a small round top.  Pipe an oval border along the edges of each cookie.  Pipe a line in the middle, dividing the cookies in two halves.

Divide the remaining icing between 3 bowls.  Add ¼ teaspoon of food coloring to each bowl of frosting and mix until combined.  Fill ½ of each cookie with the pastel icing.

Add another ¼ teaspoon of food coloring to the bowls and mix until combined.  Use the deeper-colored icing to fill the other half of the cookies.

Top the cookies with nonpareil sprinkles.


Easter Bunny Pancakes | Gluten-free

Gluten-free Rainbow Easter Bunny Pancakes

Hop to it and make this cute breakfast your kids are sure to love! Enjoy a colorful breakfast free from artificial dyes with natural coloring from plant-sources like beets and turmeric. It’s so easy with our gluten-free mix that comes with rainbow colors!

MAKES: 4 BUNNY PANCAKES
Cook Time: 20 minutes

Ingredients

1 Color Kitchen Gluten-free Rainbow Pancake Mix
1 ½ cup milk (or substitute)
2 tbsp melted butter or oil
2 eggs (or egg substitute)
½ cup whipped cream

Directions

Blend pancake mix with milk, butter and eggs. Split batter into 4 bowls, approx ¾ cup each. Add 1 color packet to each bowl and blend until all the color has dissolved.

Heat a skillet to medium-low heat. With the pink batter, make large (about 4-inch) circles on the skillet for the body. For the head, use the yellow batter to make medium (about 2-inch) circles.  Using the green batter, make small (about 1-inch) circles for the feet.  And lastly, for the ears use the blue batter, making small (about 2-inches x 1 inch) ovals. Cook all pancakes for about 2 minutes on each side.

Assemble the bunny. Place the blue ears at the top of a plate. Place the yellow head slightly overlapping the bottom of the ears.  Place the pink body pancake below the head, slightly overlapping. Place two green feet pancakes at the bottom, slightly overlapping the body. Place a dollop of whipped cream on the body just above the feet to make a tail.

Top with butter or syrup to your liking and enjoy!


Lemon Pistachio Macaroons | Gluten-free | Vegan-friendly

Pistachio Macaroon Natural Sprinkle

Soft and chewy, lemon-zesty coconut macaroons are the prefect sweet treat for a gluten-free diet.

MAKES: 10 MACAROONS
Prep time: 10 minutes

Ingredients

1 ⅓ cup finely shredded coconut
¼ cup almond flour
¼ cup honey (or coconut nectar)
3 tbsp coconut oil, at room temperature
1 tbsp lemon juice
1 tbsp lemon zest
¼ tsp salt
½ cup finely chopped pistachios
1 Color Kitchen Plain Frosting Mix
1 Color Kitchen Green Color Packet
1 Color Kitchen Nonpareil Sprinkles
3 tbsp milk (or milk alternative)
1 tsp vanilla

Pistachio Macaroon Natural Sprinkles

Directions

Preheat the oven to 350 degrees.  Line a baking sheet with parchment paper.

Add the coconut, almond flour, honey, coconut oil, lemon juice, lemon zest, and salt to a food processor.  Pulse 15-20 times, until all of the ingredients come together in a soft dough. 

Transfer the dough to a bowl.  Using a spatula, fold in the chopped pistachios.

Shape the dough into 10 balls.  Place on the baking sheet and bake for 16 minutes.

While the macaroons are baking, prepare the icing.  Add the powdered sugar, color packet, milk, and vanilla extract to a bowl and mix until evenly combined.

Once the macaroons have cooled, drizzle on the icing and top with nonpareil sprinkles.

Lavender Pistachio Coconut Cream Puffs | Natural | Dye-free

Color Kitchen Cream Puffs 3-blog.jpg

MAKES: 18-22 SERVINGS
Prep time: 30 minutes, Cook time: 32 minutes

INGREDIENTS

CRAQUELIN TOPPING
½ cup (1 stick) unsalted butter, softened
1 cup all-purpose flour
½ cup brown sugar 

CHOUX PASTRY
½ cup whole milk
½ cup water
½ cup (1 stick) unsalted butter
¼ tsp salt
1 tbsp sugar
1 cup all-purpose flour
4 large eggs 

COCONUT CREAM FILLING
1 13.5-oz cans coconut cream, chilled overnight
6 tbsp confectioners’ sugar
½ tsp lavender extract
½ tsp pistachio extract
1 Color Kitchen Green Food Color packet
1 Color Kitchen Pink Food Color packet
1 Color Kitchen Blue Food Color packet

DIRECTIONS

Make the craquelin topping.  Using a stand mixer or hand mixer, mix the butter, flour, and brown sugar until they come together into a dough. 

Form the dough into a ball, then sandwich it between two sheets of parchment paper.  Roll out the dough to be about ⅛ inch thick, then place it in the freezer while you prepare the pastry.

Make the choux pastry.  Place the water, milk, butter, sugar, and salt in a medium saucepan over medium heat, and bring to a boil.  Once boiling, add the flour to the pot and stir vigorously for two minutes.  The ingredients should come together into a ball of dough.

Transfer the dough to a stand mixer with a paddle attachment and beat for 30 seconds to a minute to cool.  Add the eggs to the dough, one at a time, to create a thick batter.  The batter has the correct consistency when you can lift up the paddle, and the batter drips off in a V-shape.  If the batter is too thick and does not create a V-shape, add one additional egg.

Color Kitchen Cream Puffs 1-blog-sm.jpg

Preheat the oven to 425 degrees and line 2 baking sheets with parchment paper.

Spoon the batter into a piping bag with a large round tip.  Pipe 1 ½ inch rounds onto the baking sheets.  Cut 1 ½ inch rounds from the craquelin topping.  Press a craquelin round onto each piped cream puff.

Bake the cream puffs at 425 degrees for 10 minutes, then turn the oven temperature down to 325 degrees and bake for an additional 22 minutes, until golden brown.  Let cool for at least 15 minutes.

While the cream puffs are cooling, prepare the coconut cream filling.  Open the chilled cans of coconut cream and scoop out the cream from the top of the can. Discard the coconut water that has settled to the bottom of the cans.  Place the cream in the bowl of a stand mixer with a whisk attachment and add the confectioner’s sugar.  Whisk on high speed for 1 minute, until smooth and fluffy. 

 Divide the coconut cream between 2 bowls.  In one bowl, fold the lavender extract, blue color packet, and pink color packet into the cream.  In the other bowl, fold in the pistachio extract and green color packet.

Combine the two coconut creams in a piping bag with a star tip.  Cut each cream puff in half.  Pipe the coconut cream into the bottom half of each cream puff, then sandwich the two halves together.


Paleo Carrot Cake Bars with Natural Robin's Egg Frosting | Gluten-Free | Dairy-Free

carrot_cake.jpg

These easy paleo carrot cake bars are gluten-free, dairy-free and full of flavor!

INGREDIENTS

CARROT CAKE BARS
2 ¾ cups almond flour
¼ cup oat flour, or coconut flour for paleo
⅓ cup unsweetened shredded coconut
2 tsp cinnamon
½ tsp ground ginger
½ tsp nutmeg
⅛ tsp ground cloves
2 tsp baking powder
½ tsp baking soda
¼ tsp sea salt
½ cup coconut sugar
½ cup coconut oil, melted and cooled, or neutral oil like grapeseed oil
1 tsp vanilla extract
5 tbsp maple syrup
2 eggs, room temp
1 cup finely shredded carrot
¼ chopped dates, or raisins
¼ chopped walnuts, or other nuts

ROBIN EGG VANILLA BUTTERCREAM
1 cup powdered confectionary sugar, or unrefined powdered sugar for paleo**
¼ cup non-dairy butter, I use Miyoko's
½ tsp vanilla extract
2-3 tsp non-dairy milk, as needed
1 packet of Color Kitchen Blue Color packet
1 tbsp of melted chocolate chips for speckling

ingredients.jpg

DIRECTIONS

1. Preheat oven to 350F and line an 8”x8” square baking pan with parchment and spray edges with cooking spray. Set aside.

2. In a medium bowl, mix together the almond flour, oat or coconut flour, shredded coconut, cinnamon, ginger, nutmeg, cloves, baking powder, baking soda and sea salt. Combine well until no lumps remain.

3. In a larger mixing bowl, whisk together the coconut sugar, melted and cooled coconut oil, vanilla, maple syrup, and room temperature eggs (this is important so the coconut oil does not coagulate — place them in a bowl of warm water for 3 minutes if they are not room temperature) until well combined and smooth.

4. Add the dry ingredients to the wet and mix until just combined. Now add in the shredded carrots, dates and nuts. Mix again with a spatula or spoon until incorporated.

5. Carefully fold the batter into the prepared baking pan and spread until even. Shake and tap the pan to release air bubbles.

6. Bake 22-28 minutes, edges will brown and top will set. Toothpick will come out clean with just a few crumbs when ready. And the cake will bounce back with a light touch.

7. Place on cooling rack to cool before removing from pan.

8. Prepare the buttercream frosting. Mix together all ingredients except for food coloring in a small bowl with a hand mixer or stand mixer until smooth. Start with 2 tsp of non-dairy milk and add 1 tsp more at a time if too dry. Or add more powdered sugar to thicken. Once desired consistency, add in blue food color powder or natural blue food coloring. Start with just a few drops so it’s a pastel blue.

9. Once the carrot bars have cooled, remove them in one piece by lifting the parchment sides and place back on cooling rack. Generously frost them with the blue frosting.

10. Melt the 1 tbsp of chocolate chips or bar in a microwave safe bowl or over the stove top. They will melt fast so melt in small increments, 15 seconds at a time. Once melted, dip a clean small paintbrush into the chocolate and flick it back with your fingers to create speckled splashes onto the frosting. Depending on the chocolate chips used, they may be too thick to create a splash. If so, add 1 tsp of coconut oil to the chocolate to thin it out. Keep flicking the paintbrush until you reach the desired amount of speckle.

11. Wait for chocolate to set. Then slice into bars and enjoy!

Notes:

·       I have not tried egg subs here but I do think flax eggs will work (2 tbsp ground flax + 6 tbsp warm water) They just may be a little more dense. Aquafaba eggs may work, too.

·       To make your own unrefined powdered sugar, place any granulated sweetener in a high speed blender for 30-60 seconds. I prefer to use coconut sugar because it is my go to low glycemic sweetener but you can use any granulated sugar or monkfruit.

·       You can use any powdered sugar for the frosting, just know if you use a brown sugar like coconut sugar, your frosting won’t bright blue!

~Gutsy Baker, Stephanie Charbonneau

Cream Cheese Mints | Gluten-free | Natural

CreamCheeseMints_0047.jpg

Feel like a fancy baker with these colorful creations. Practice your piping and your color combos, and see what you can come up with!

MAKES: 10 DOZEN

INGREDIENTS

8 oz. organic cream cheese (one package)
2 tbsp (28 g.) organic salted butter
1 tsp organic coconut oil
850 g. (6 cups) organic powdered sugar, sifted
1 tbsp organic peppermint flavor (or if you’re using extract only 1 ½ tsp)
2-3 Color Kitchen Color packets (yellow, pink, blue shown here)
water

DIRECTIONS

In the bowl of your stand mixer fitted with the paddle attachment, add the cream cheese, butter and coconut oil. Mix on low until combined then speed mixer up to high and whip for 1-2 minutes. 

Turn the speed down to medium and slowly incorporate all the powdered sugar. Once completely incorporated, scrape down the sides of the mixing bowl and add the vanilla extract and peppermint flavor. Then turn speed up to high and whip again for 1-2 minutes.

Separate into three different bowls, each bowl should have about 221 g. each.

In one bowl add ½ tsp yellow and just a drop of water on top of the yellow to help incorporate. Stir to combine completely.

In the second bowl, add ⅛ tsp pink and ⅛ tsp blue to make lavender and a drop of water. And in the third, add ¼ tsp blue and ¼ tsp yellow to make mint and a drop of water. Stir both so they are completely combined.

Put each color in a piping bag with decorating tip #864.

CreamCheeseMints_0012.jpg

Line two baking sheets with parchment paper. Pipe little dollops onto a baking sheet with parchment paper.

Place in the fridge until set, about 6 hours or overnight.

Store in the fridge.


Easter Cake | Natural | Artificial Dye-free

EasterCake_0111.jpg

We absolutely love the Simple Mills and Color Kitchen collab — especially for something as cute as this!

Makes: 3 Layer 6” Cake (or 2 Layer 8” Cake)

Ingredients

2 boxes Simple Mills Vanilla Cake Mix
3 Jars Simple Mills Vanilla Frosting
1 Blue Color Kitchen Color packet
1 Green Color Kitchen Color packet
1 Orange Color Kitchen Color packet
1 Color Kitchen Rainbow Sprinkles

Directions

Follow the directions on the back of the box to bake the cake mix and pour into either 3 6” cake pans or 2 8” cake pans.

Once the cake is cooled, remove from pans.

In a mixing bowl, or in your stand mixer fitted with the paddle attachment, add 2 jars of frosting and 1 packet of ColorKitchen Blue and mix to combine completely.

On a cake stand, plate or spinner, add a small dollop of frosting and place the first cake layer. Add a generous amount of frosting and spread to cover the layer evenly. Top with the second cake layer, and repeat this process. Frost the rest of the cake with the blue frosting.

EasterCake_0068.jpg

Divide the last jar of frosting into two bowls. In the first add ColorKitchen Orange packet and stir to combine completely. In the second, add the ColorKitchen Green packet and stir to combine completely.

In a piping bag with decorating tip #133, add the green frosting. You will use this for the grass and for the carrot tops. Set aside.

In a piping bag with a coupler, add the orange frosting and decorating tip #104. This will be used for the carrots.

First, pipe grass all the way around the boarder of the cake.

Next, with the larger side of tip #104 up against the cake and the smaller side closer to you, pipe a line going back and forth to create a carrot shape. Do this around the entire cake, or anywhere that you want carrots. You can make them varying sizes and heights, have fun with it

Using the green frosting, pipe little dollops on the tops of all carrots to create the tops.

Switch out the decorating tip #104 for #96 in the orange and pipe a boarder around the top of the cake.

Sprinkle the top with ColorKitchen Rainbow Sprinkles.

Shortbread Cookies with Royal Icing and Candied Flowers and Herbs | Artificial Dye-free

candied flower shortbread cookie

These cookies are absolutely gorgeous and invite you to get creative in decorating with nature!

MAKES: 16-18 COOKIES

INGREDIENTS

COOKIES
⅓ cup rice flour
1½ tsp kosher salt
2½ cups all-purpose flour, plus extra for rolling dough
1 cup (2 sticks) plus 6 Tbsp. unsalted butter, cut into pieces, room temperature
¾ cup granulated sugar
candied flowers and/or herbs for decorating

ROYAL ICING
3 large egg whites
4 cups powdered sugar
½ tsp cream of tartar
2-3 Color Kitchen Color packets
a couple drops of water or glycerin for mixing colors

DIRECTIONS

ICING
Using a wooden spoon or rubber spatula, stir egg whites, powdered sugar, and cream of tartar in a medium bowl until a thick paste forms with no dry spots. Ideally, icing should sit at least 12 hours for sugar to fully hydrate (it can be covered and chilled up to 1 week), but it can be used as soon as cookies have cooled.

Bring to room temperature before using. In separate bowls mix colors with a couple drops of water or glycerin to form a smooth paste. For pastels use about ½ a packet per bowl. Starting slowly add icing to colors. Stir and continue adding until you have reached the desired intensity of color.

Cover your bowls of colored icing well with plastic to avoid them drying out until you are ready to start decorating. 

SHORTBREAD
Whisk rice flour, salt, and 2½ cups all-purpose flour in a medium bowl. Using a stand mixer with the paddle on medium-high, beat butter and sugar until very pale and fluffy, about 5 minutes. Mix in dry ingredients on low until fully combined. Form into a flat disk and wrap in plastic and chill at least 2 hours, and up to 2 days.

Preheat oven to 350°. Roll out dough between 2 sheets of lightly floured parchment to ⅛” thick. Using large cutter, cut out 16 rounds, re-rolling scraps. Using small cutter, punch out centers. Bake on parchment-lined baking sheets until edges are golden, 12–14 minutes. Let cool on a wire rack.

DECORATING
Ice your cookies using the instructions in the link below. This method is called “flooding”. While the icing is still wet add your candied flowers in any design you like. Let them dry completely before storing them in a single layer in an air-tight container.

Excellent video showing how to ice cookies.        
How to make candied flowers.

- Recipe by chef Rose Archer

Easter Egg Sprinkle Cookies

A fun way to celebrate Easter with the kids while not having to dye eggs!

MAKES: 3 Dozen Cookies

Ingredients-Cookie

2 sticks (227 g.) organic butter, softened
142 g. organic powdered sugar, sifted
2 tsp. organic almond extract
255 g. organic flour
3 packets Color Kitchen Foods Rainbow Sprinkles

Ingredients-Topping

340 g. (12 oz.) organic white chocolate, chopped
Color Kitchen Foods Pink, Yellow, Blue Food Dyes 

Directions

Preheat oven to 350 degrees.

In a shallow bowl, add the sprinkles. Set aside.

In the bowl of your stand mixer fitted with paddle attachment, add the butter, powdered sugar and almond extract. Mix on low until all ingredients are combined.

Add the flour and mix until combined.

On a baking sheet fitted with parchment paper, hand form egg shaped cookies. This is really simple, just make a ball and then squeeze each side a little to create a point. Each dough ball should be about 1.5” in diameter.

Dip each egg shaped dough ball into the sprinkles, and space them at least 1” apart on the baking sheet.

Bake for 13 minutes.

Allow cookies to cool before beginning next step.

In a double boiler, add the white chocolate and melt until three-quarters melted. Remove from heat and stir vigorously until completely melted.

Separate the white chocolate into four bowls.

Sprinkle a little bit of pink dye into one bowl, yellow in another, blue and yellow to create green in another and pink and blue to create purple. Use equal parts of each when combining the colors. To get pastel colors, it is too little of an amount to measure so be careful not to sprinkle too much or you’ll end up with a brighter color.

Stir each bowl of chocolate to combine the dyes completely.

Dip the bottom (the non sprinkle side) of each cookie in different colored chocolate. Set them chocolate side down on a baking sheet with parchment paper.

Allow to set until cool or in the fridge.

Eat cookies!

Store in a cool dry place, or in the fridge.

Baker’s Note: To make these cookies gluten free, substitute the organic flour for 227 g. organic gluten free flour blend and 57 g. organic coconut flour.

Mammoth Lakes – bake at 350 for 11 minutes

- Recipe by Mimi's Cookie Bar

Flower Cupcakes

These creations require a certain level of effort, but are oh-so worth it!

MAKES: 2 Dozen Cupcakes

Ingredients-Cupcakes


2 sticks (226 g.) organic butter, softened
340 g. organic sugar
1 T. + 1 tsp. organic lemon flavor
4 organic large eggs
1 cup organic heavy whipping cream
340 g. all natural cake flour
1 tsp. baking powder
1 tsp. sea salt

Ingredients-Frosting


3 sticks (340 g.) organic butter, softened
680 g. (24 oz.) organic powdered sugar, sifted
1 T. organic coconut extract
Color Kitchen-Pink, Blue and Yellow Dyes

Ingredients-Chocolate Frosting


2 T. organic butter, softened
15 g. organic Dutch cocoa, sifted
42 g. organic powdered sugar, sifted
1 tsp. water

Tools


Piping Bags
Decorating tips #127, 864, 846, 56

Directions


Preheat oven to 350 degrees.

In the bowl of your stand mixer fitted with paddle attachment, add the butter, sugar and lemon flavor. Mix on low until all ingredients are combined.

Add the eggs and mix until combined.

In a separate bowl, add the cake flour, baking powder and sea salt and whisk together.

Add the cake flour and and cream in together and mix on low until you have a smooth cake batter.

Line two cupcake pans with liners, and fill cupcakes three-quarters full.

Bake for 17 minutes or until a wooden pick inserted in center comes out clean.

Allow cupcakes to cool before frosting.

In the bowl of your stand mixer fitted with paddle attachment, add the butter, powdered sugar and coconut extract. Mix on low until all ingredients are combined, then speed mixer up to high for 1 minute or until light and fluffy.

flower cupcakes

Separate the frosting into four separate bowls, each bowl should weigh about 255 g.

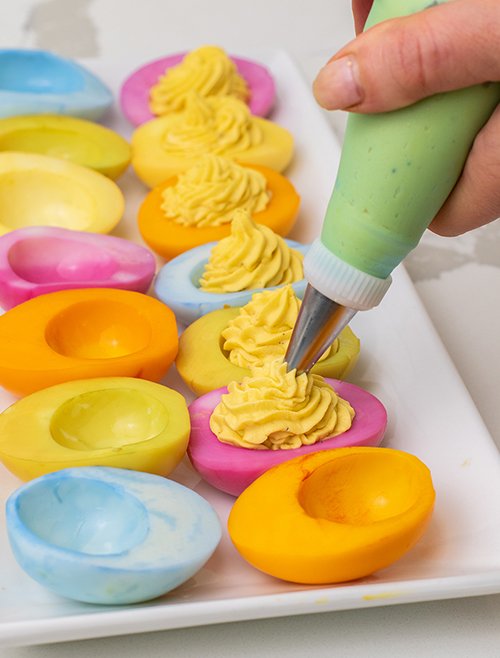
In one bowl, color it pastel yellow by adding ½ tsp. ColorKitchen Yellow Dye. Stir to combine completely. Put in a piping bag with decorating tip #846.

In the second bowl, make pastel purple by adding ⅛ tsp. ColorKitchen Pink Dye and  ⅛ tsp. ColorKitchen Blue Dye. Stir to combine completely. Put in a piping bag with decorating tip #127.

In the third bowl, make pastel pink by adding ¼ tsp. ColorKitchen Pink Dye. Stir to combine completely. Put in a piping bag with decorating tip #846.

In the last bowl, add ⅛ tsp. ColorKitchen Pink Dye and ¼ tsp. ColorKitchen Yellow Dye to create a pastel orange. Stir to combine completely. Put in a piping bag with decorating tip #864.

In your stand mixer fitted with paddle attachment, add the butter, powdered sugar, cocoa and water. Mix on low until all ingredients are combined, then speed mixer up to high for 1 minute or until light and fluffy. Put the chocolate frosting in a piping bag with decorating tip #56. Set aside.

We've included a video below on how to pipe beautiful flowers onto your cupcakes using our plant-based food coloring. 

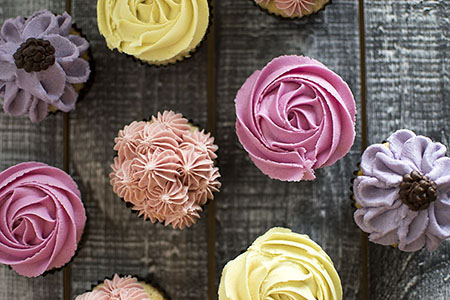
To frost the pink and yellow cupcakes (like Roses), start in the middle and work your way to the outer edge in a circular motion.

To frost the pastel orange cupcakes, make dollops around the boarder, then in between each dollop, make another dollop on top, finally make the last dollop in the center.

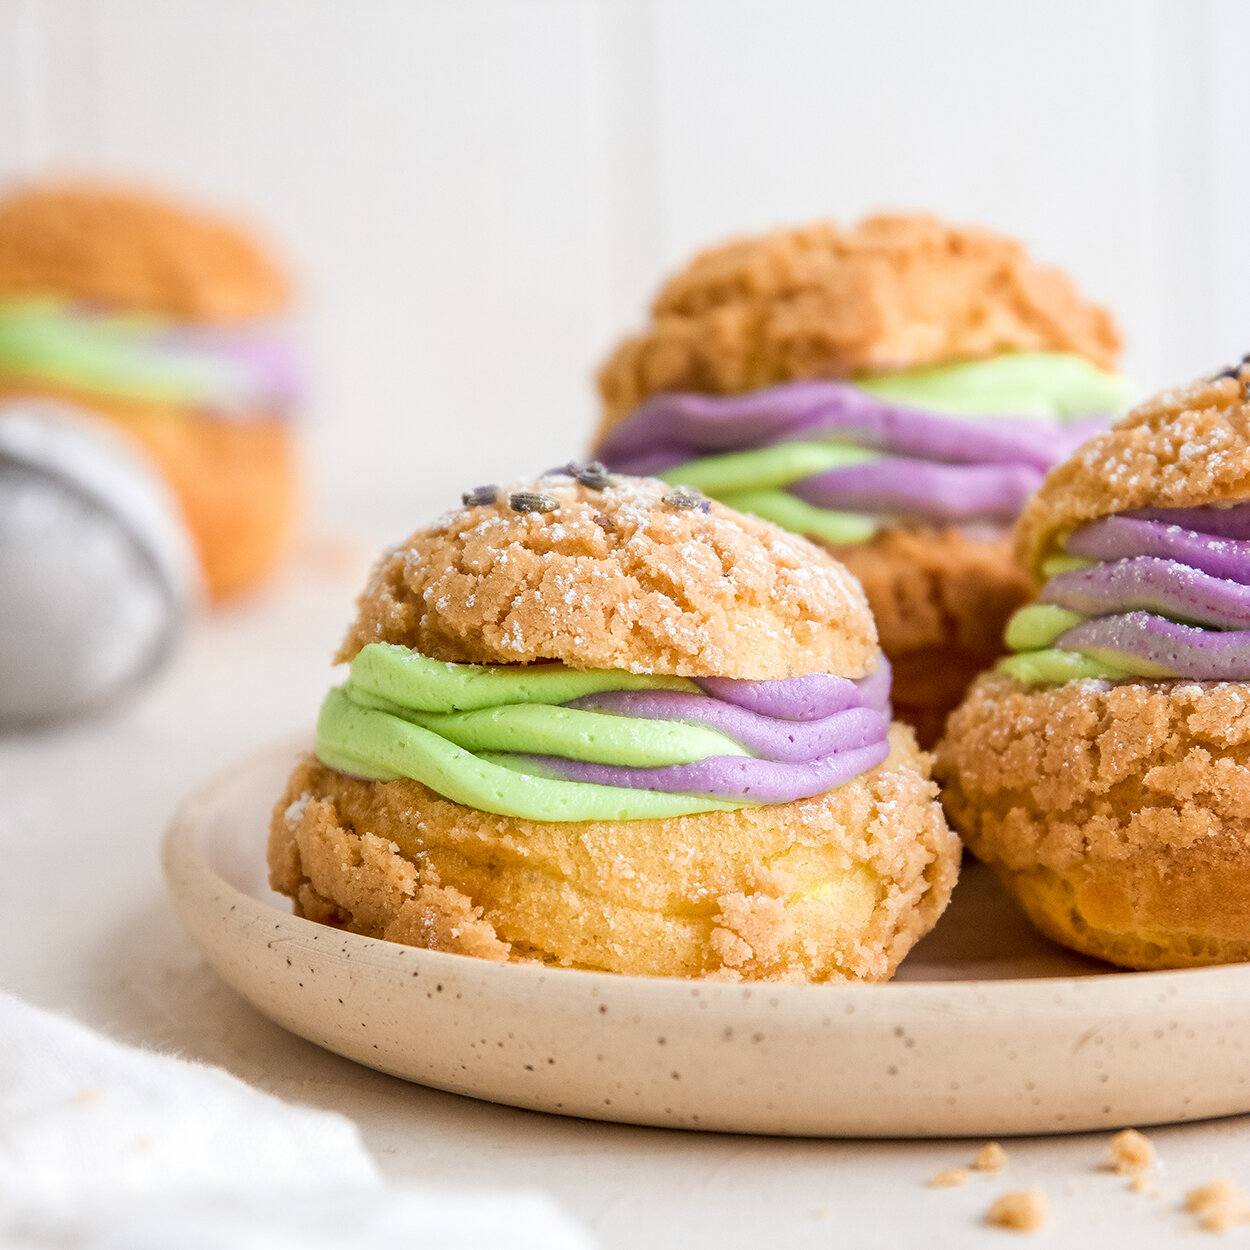
To frost the lavender cupcakes, start with the piping bag in the center of the cupcake, with the smaller end of the tip towards the inside and the larger part of the tip towards the outside. In a swooping motion, make a petal. Right next to it, make another, and another until you’ve gone around the entire cupcake. In between the first two petals, make another petal and complete a second row on top.

Using the chocolate frosting, pipe small dollops in the center of the flower in a circle to cover up the beginning parts of the petals.

Eat flower cupcakes!

Store in a cake dome.

Baker’s Note: To make brighter colors you can double the amount of food coloring. You can also make different colors! To make these cupcakes gluten free, just substitute the cake flour for an organic gluten free flour blend.


 Recipe by Mimi's Cookie Bar

Learn how to pipe beautiful flowers using our natural food coloring.