Thanksgiving

Red Velvet Lattice Pie Crust - Cranberry Blood Orange Pie | Natural | Dye-free

A creative spin on a classic dish — who doesn’t love a homemade pie? Decorative, delightful and free of dye, this dessert checks all the boxes!

MAKES: 10 SERVINGS
Prep Time: 35 minutes
Chill Time: 2 hours
Cook Time: 50 minutes

Ingredients

PLAIN PIE CRUST
2 ½ cup all-purpose flour
1 cup (2 sticks) unsalted butter, cold
1 tbsp granulated sugar
1 tsp salt
4-8 tbsp water

RED PIE CRUST
1 ¼ cup all-purpose flour
1 Color Kitchen Red Velvet Color Packet
½ cup (1 stick) unsalted butter, cold
1 ½ tsp granulated sugar
½ tsp salt
2-4 tbsp ice water
1 egg for egg wash

FILLING
3 cups fresh cranberries
¼ cup granulated sugar
2 tsp blood orange zest
juice of ½ a blood orange
2 tbsp flour
¼ tsp salt

Directions

Prepare the plain crust.  In a large bowl, whisk together the flour, sugar, and salt.  Using a pastry cutter or 2 forks, cut the butter into the flour mixture to create a coarse meal.  Add the water one tablespoon at a time and mix after each addition, until the dough forms large clumps and can be shaped into a ball.  Divide the dough in half.  Form each half into a disk, wrap with plastic wrap, and place in the refrigerator for at least 2 hours, up to overnight.

Prepare the red crust.  In a large bowl, whisk together the flour, sugar, red velvet color packet and salt.  Using a pastry cutter or 2 forks, cut the butter into the flour mixture to create a coarse meal.  Add the water one tablespoon at a time and mix after each addition, until the dough forms large clumps and can be shaped into a ball.  Form the dough into a disk shape, wrap with plastic wrap, and place in the refrigerator for at least 2 hours, up to overnight.

Prepare the filling.  Add all of the filling ingredients to a large bowl and toss until evenly distributed.

Preheat the oven to 450 degrees.

Roll out one disk of plain dough into a 10-inch circle.  Transfer it to a 9-inch pie plate and trim the edges.  Add the filling.

Roll out the red pie dough into a rectangle, about ⅛-inch thick.  Cut it into strips.  Arrange the strips over the pie.

Roll out the remaining plain pie dough into a rectangle, about ⅛-inch thick.  Cut it into strips.  Weave the plain dough strips with the red dough strips to create a lattice topping.

Beat the egg with 1 tablespoon of water.  Brush it over the top of the pie.

Bake the pie for 10 minutes at 450 degrees, then lower the oven temperature to 350 degrees and bake for an additional 40 minutes.  If the crust is becoming too brown, place a sheet of aluminum foil over the top of the pie. 

Let the pie cool for at least 15 minutes and serve with vanilla ice cream.


Chocolate Orange Shortbread Cookies | Natural

These chocolatey cookies are a zesty Thanksgiving treat, and can also be made with our other natural colors for any holiday.

MAKES: 30 cookies
Prep Time: 20 minutes
Chill Time: 2 hours
Cook Time: 12 minutes

Ingredients

¾ cup unsalted butter, softened
⅔ cup light brown sugar
1 large egg
1 tsp vanilla extract
2 tbsp orange zest
1 tbsp orange juice
1 cup all-purpose flour
2 Color Kitchen Orange Color Packets
¼ tsp salt
6 oz chopped dark or semi-sweet chocolate
Optional: flaky sea salt, to sprinkle on top

Directions

Using a hand mixer or a stand mixer with a paddle attachment, beat the butter and sugar together on medium-high speed until light and fluffy.

Add the egg, vanilla, orange juice, and orange zest to the butter mixture and beat on medium-low speed until combined.

In a separate bowl, whisk the flour, salt, and orange color until evenly combined.

Add the dry ingredients to the wet ingredients and beat together on medium speed until just combined in a smooth dough.

Place the cookie dough on a lightly floured surface.  Using floured hands, shape the dough into 2 logs, each about 9 inches long and 2 inches thick.  Wrap the logs in plastic wrap and place in the refrigerator to chill for at least 2 hours, up to 48 hours.

When the dough is finished chilling, preheat the oven to 350° and line a baking sheet with parchment paper.

Remove the logs from the refrigerator and slice each log into 14-15 cookies.  Place the cookies on the baking sheet and bake for 12 minutes.

Let the cookies cool for at least 10 minutes.  While the cookies are cooling, microwave the chocolate in 30 second increments, stirring after each increment, until completely melted.

Dip each cookie in chocolate, or drizzle chocolate over the cookies.  Top with flaky sea salt (optional).

Black Chocolate & Orange Bundt Cake with Greek Yogurt | DYE-free

Color Kitchen Black Cake 3-web_blog.jpg

This Halloween or Thanksgiving, try our super rich and moist black chocolate cake recipe, made with Greek yogurt and natural ingredients. Topped with an artificial dye-free bright orange icing made easy with our Icing (frosting) Mixes.

MAKES: 1 BUNDT CAKE
Prep time: 15 minutes
Cook time: 45 minutes

Color Kitchen Black Cake 1-blog.jpg

INGREDIENTS

CAKE
1 cup (2 sticks) unsalted butter (plus some for greasing the pan)
1 cup whole milk
⅓ cup black Dutch-process cocoa powder
2 cups all-purpose flour
1 ¾ cup granulated sugar
1 ½ tsp baking powder
½ tsp salt
2 eggs
½ cup plain Greek yogurt

ICING
1 Color Kitchen Plain Icing (Frosting) Mix
3 tbsp milk or milk alternative
1 Color Kitchen Orange Color Packet
½ tsp natural orange extract

DIRECTIONS

Preheat the oven to 350 degrees and grease a 10-cup bundt pan.

In a small saucepan over medium heat, combine the butter, milk and cocoa powder. Mix over heat until the butter is melted and the cocoa powder has dissolved into the milk. Remove from heat.

Combine the dry ingredients. In a large bowl, whisk together the flour, sugar, baking soda and salt.

Add the butter and cocoa powder mixture to the dry ingredients and whisk to create a thick batter. Then add the eggs to the batter and whisk until smooth. Add the Greek yogurt to the batter and whisk one more time until all ingredients are evenly combined.

Pour the batter into the prepared bundt pan. Bake for 45-50 minutes, until a toothpick inserted in the center comes out clean. Allow the cake to cool in the pan for 20 minutes before inverting it onto a cooling rack.

While the bundt cake is cooling, prepare the orange icing. Add the frosting mix, milk, and orange extract to a large bowl and mix until smooth.

Once the cake is cooled, pour the icing on top.

Pumpkin Orange Spice Pop Tarts | Natural

Color Kitchen Pop Tarts_Stack_Web.jpg

Who doesn’t love poptarts? Pumpkin spice? Combine these two cult favorites and get the most delectable treat, ever!

MAKES: 8 POP TARTS
Prep time: 25 minutes, Cook time: 25 minutes, Chill time: 1 hour 

INGREDIENTS

DOUGH
2 ½ cups all-purpose flour
1 tsp salt
1 tbsp sugar
1 cup (2 sticks) unsalted butter, cold
4-6 tbsp ice-cold water
1 egg (for egg wash)

FILLING
½ cup pumpkin purée
3 tbsp brown sugar
½ tsp pumpkin spice
1 egg

ICING
1 Color Kitchen Plain Icing (Frosting) Mix
3 tbsp milk or milk alternative
1 Color Kitchen Orange Color Packet
½ tsp natural orange extract (optional)

DIRECTIONS

 In a large bowl, whisk together the flour, sugar, and salt. 

Using a pastry cutter or two forks, cut the butter into the flour mixture to create a coarse meal.  Add the water, one tablespoon at a time, and stir with a wooden spoon after each addition until the mixture comes together in a crumbly dough. 

Color Kitchen Pop Tarts 1-blog2.jpg

Divide the dough in half and form each half into a disk.  Wrap the disks in plastic wrap and chill for at least 1 hour.

While the dough is chilling, prepare the filling.  Combine all filling ingredients in a medium bowl and whisk until evenly combined.

Preheat the oven to 350 degrees and line a baking sheet with parchment paper.

When the dough is done chilling, roll each disk into a large rectangle, about ⅛ inch thick. Cut 8 even rectangles from each dough disk (16 rectangles total).

Place 8 rectangles on the baking sheet. Spoon a dollop of filling on each of the 8 rectangles, then place another rectangle of dough on top.  Crimp the edges with a fork. Use a knife to poke a few holes on top of each pop tart.

Whisk an egg with a tablespoon of water to create an egg wash.  Brush the egg wash over each pop tart.

Bake the pop tarts for 20-25 minutes, until golden brown.

While the pop tarts are cooling, make the icing. Combine powdered sugar and color in a large bowl and blend. Then whisk in the remaining ingredeints until combined.

 Spoon some icing onto each pop tart, and top with sprinkles. Allow icing to dry before enjoying.

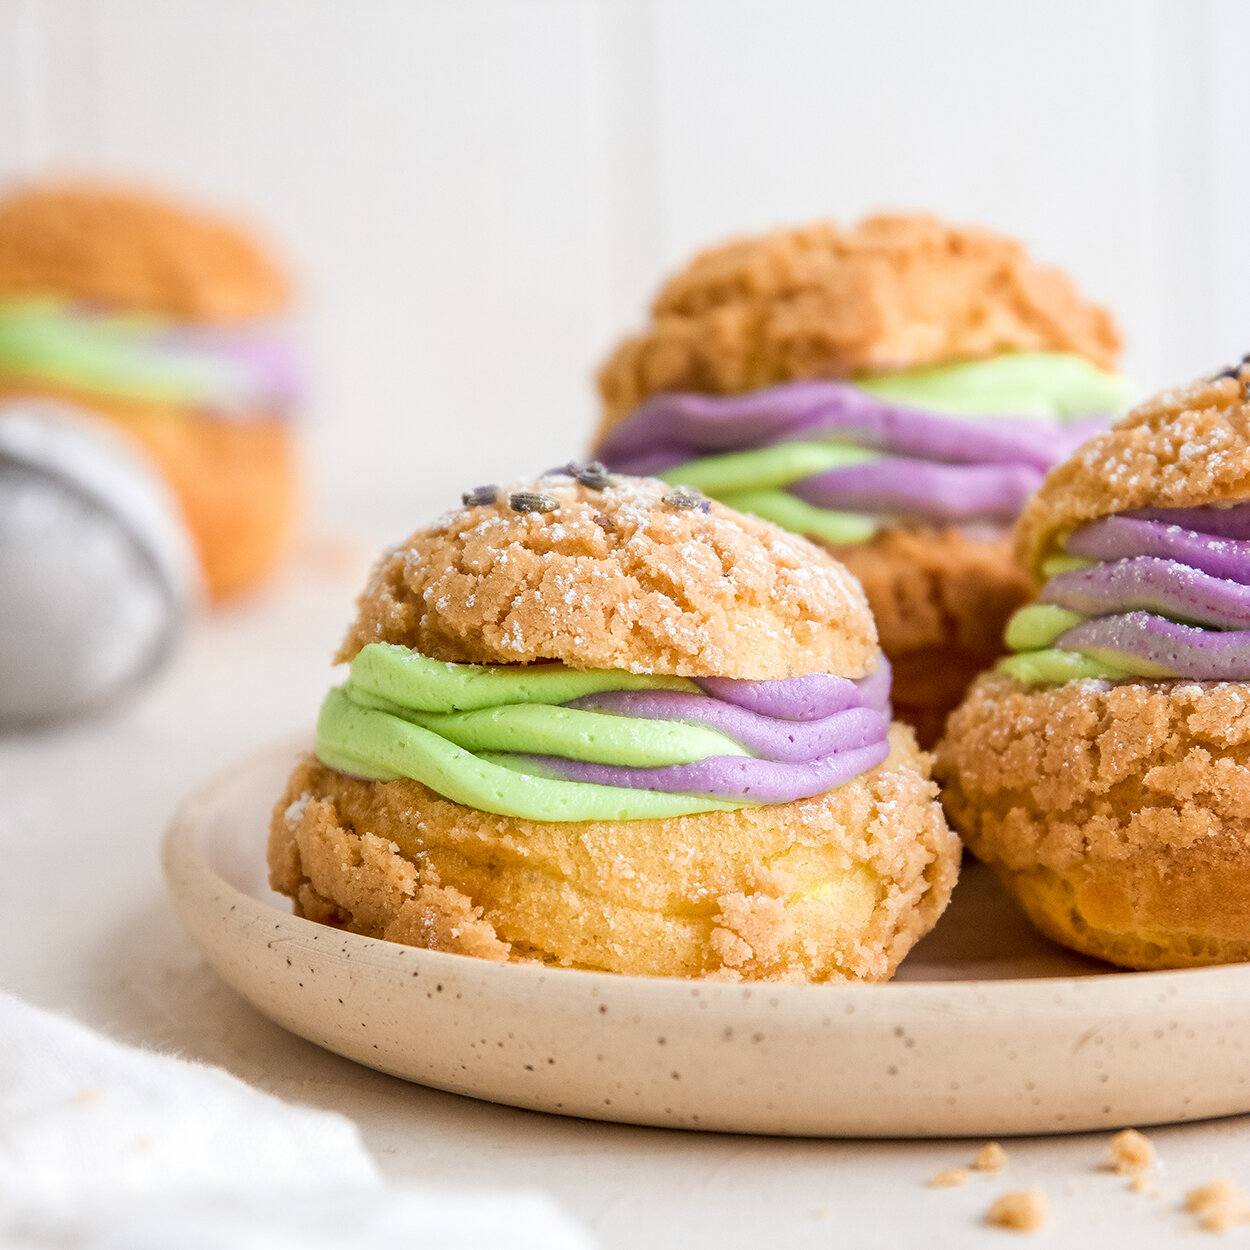
Lavender Pistachio Coconut Cream Puffs | Natural | Dye-free

Color Kitchen Cream Puffs 3-blog.jpg

MAKES: 18-22 SERVINGS
Prep time: 30 minutes, Cook time: 32 minutes

INGREDIENTS

CRAQUELIN TOPPING
½ cup (1 stick) unsalted butter, softened
1 cup all-purpose flour
½ cup brown sugar 

CHOUX PASTRY
½ cup whole milk
½ cup water
½ cup (1 stick) unsalted butter
¼ tsp salt
1 tbsp sugar
1 cup all-purpose flour
4 large eggs 

COCONUT CREAM FILLING
1 13.5-oz cans coconut cream, chilled overnight
6 tbsp confectioners’ sugar
½ tsp lavender extract
½ tsp pistachio extract
1 Color Kitchen Green Food Color packet
1 Color Kitchen Pink Food Color packet
1 Color Kitchen Blue Food Color packet

DIRECTIONS

Make the craquelin topping.  Using a stand mixer or hand mixer, mix the butter, flour, and brown sugar until they come together into a dough. 

Form the dough into a ball, then sandwich it between two sheets of parchment paper.  Roll out the dough to be about ⅛ inch thick, then place it in the freezer while you prepare the pastry.

Make the choux pastry.  Place the water, milk, butter, sugar, and salt in a medium saucepan over medium heat, and bring to a boil.  Once boiling, add the flour to the pot and stir vigorously for two minutes.  The ingredients should come together into a ball of dough.

Transfer the dough to a stand mixer with a paddle attachment and beat for 30 seconds to a minute to cool.  Add the eggs to the dough, one at a time, to create a thick batter.  The batter has the correct consistency when you can lift up the paddle, and the batter drips off in a V-shape.  If the batter is too thick and does not create a V-shape, add one additional egg.

Color Kitchen Cream Puffs 1-blog-sm.jpg

Preheat the oven to 425 degrees and line 2 baking sheets with parchment paper.

Spoon the batter into a piping bag with a large round tip.  Pipe 1 ½ inch rounds onto the baking sheets.  Cut 1 ½ inch rounds from the craquelin topping.  Press a craquelin round onto each piped cream puff.

Bake the cream puffs at 425 degrees for 10 minutes, then turn the oven temperature down to 325 degrees and bake for an additional 22 minutes, until golden brown.  Let cool for at least 15 minutes.

While the cream puffs are cooling, prepare the coconut cream filling.  Open the chilled cans of coconut cream and scoop out the cream from the top of the can. Discard the coconut water that has settled to the bottom of the cans.  Place the cream in the bowl of a stand mixer with a whisk attachment and add the confectioner’s sugar.  Whisk on high speed for 1 minute, until smooth and fluffy. 

 Divide the coconut cream between 2 bowls.  In one bowl, fold the lavender extract, blue color packet, and pink color packet into the cream.  In the other bowl, fold in the pistachio extract and green color packet.

Combine the two coconut creams in a piping bag with a star tip.  Cut each cream puff in half.  Pipe the coconut cream into the bottom half of each cream puff, then sandwich the two halves together.


EASY, Colorful Maple Syrup Icing | Natural

Orange_icing.jpg

This simple icing recipe has just a few ingredients and you can make it in minutes.

ORange_mix.jpg

MAKES: 2 CUPS

INGREDIENTS

3 cups powdered sugar
4 tbsp milk (or substitute)
¼ tsp vanilla
2 tsp maple syrup
1-2 Color Kitchen Color packets

DIRECTIONS

Mix dry ingredients (sugar and color).

Add milk, maple syrup and vanilla and blend until smooth. Add a little more milk if too thick.

Drizzle icing on cookies or dip and allow to dry overnight.

Remaining icing can be kept for 2 weeks in the refrigerator.

Candy Corn Ice Cream | Dairy-free | Paleo | Refined Sugar-free | Gluten-free

CandyCornIceCream_BLOG.jpg

Making your own ice cream is really not as complex as it may seem, and let’s be real, who doesn’t want this on hand in the freezer?

WHAT YOU NEED

Ice cream maker (optional but recommended!)
Saucepan
Whisk
A bread pan or airtight container

INGREDIENTS

2 cans of full fat coconut milk
1 tbsp of unsweetened gelatin powder
6-8 tbsp of honey
1 tbsp vanilla extract
Sprinkle of sea salt
1 Orange Color Kitchen Color packet
1 Yellow Color Kitchen Color packet

DIRECTIONS

If you are using an ice cream maker, make sure your ice cream bowl is frozen in advance.

Add cans of coconut milk to a saucepan and sprinkle the gelatin on top. Let sit for 3 minutes until a skin forms, and then whisk it into the milk.

Turn on your stove to medium heat and add in the honey, vanilla and sea salt. Start with 6 tbsp of honey and taste, if you want more honey flavor, or sweeter, add another tablespoon until your desired sweetness. The more honey you add, the more the ice cream will taste like candy corn! I recommend 8 tbsp (½ cup).

Heat your mixture until it reaches a low boil, then turn down and let simmer for 2 minutes.

Remove from heat and let cool until just room temperature. Then transfer into an airtight container and refrigerate until completely cold. Overnight is best. The mixture should firm up like a pudding/jiggly texture.

Once cold, transfer to your ice cream maker and churn for 20 minutes, or until ice cream is ready, per your machine. If you skip this step, your ice cream will not be as creamy but will still taste great. (You would just mix your cold mixture well until it’s smooth, skipping the churning).

When you have your honey-vanilla ice cream ready, divide it into three bowls evenly. Add one packet of orange to one bowl, and a one packet of yellow to the another bowl. Mix them in until you have a nice even color. You can add another packet of color if you want your colors to be more vibrant. Leave the last white bowl as is.

Now layer your ice cream in a small bread pan (or elongated airtight container) in three rows, starting with the white. Scoop the orange in the middle, and the fill the rest in with the yellow. So it looks like a candy corn! Optional to sprinkle real candy corns on top.

Place in freezer to set, about 45 minutes. Scoop and enjoy! It may take up to 30 minutes for your ice cream to be scoopable out of the freezer once fully set.

Recipe notes: 

-You don’t have to churn this ice cream but I highly recommend it. It makes it nice and creamy, and ice cream makers aren’t intimidating! If you decide to omit this step, just use your mixture out of the refrigerator, and mix really well before dividing into the bowls

-You can use less honey but this is what makes it taste like candy corn! I’d start with 6 tbsp and add more from there. If you want less sweet, start with 4 tbsp and add from there.

~Gutsy Baker, Stephanie Charbonneau


Pumpkin Spice Marshmallows | Keto | Paleo | Low Carb | Dairy-free | Gluten-free

pumpkin_Marhmallow.png

Soft and pillowy, great to pop in your coffee, hot cacao or just eat plain for a sweet snack or treat. Cut them into big or small pieces. The size of your pan will determine the size of your marshmallows.

For more detail recipe and nutrition notes, visit Krysten’s Kitchen.

INGREDIENTS

1 pouch NuNaturals Pumpkin Spice Syrup
½ cup water
3 tbsp Vital Protiens Gelatin
1 ½ tbsp arrowroot starch, divided
1 Orange Color Kitchen Color packet
For photos of each step see ~Marshmallow Recipe~

DIRECTIONS

In a large mixing bowl, add gelatin and water, stir and allow to sit while you prepare the syrup.

Prepare a small glass dish or 8 by 8 pan with parchment paper. Lightly spray it with olive oil or coconut oil spray and about ½ tbsp arrowroot starch.

Have a hand mixer or stand mixer READY TO GO the moment it’s needed. You can't waste any time in between steps.

In a medium size sauce pan, add the whole pouch of NuNaturals Pumpkin Spice Syrup and turn on medium heat. Allow it to reach boiling point and bubble for about 20-30 seconds and then turn off heat. This could take up to 2-3 minutes.

Pour the hot syrup slowly into the large mixing bowl of gelatin and water (which will have hardened — that’s okay!). As soon as syrup is poured in, turn hand mixer on and mix at a low speed for about 20 seconds to break up the hardened gelatin.

Crank the mixer up to HIGH speed and mix for about 6-7 minutes. After about a minute of mixing, pour in a packet of Orange Color Kitchen Color packet. It will turn white after a few minutes of mixing and thicken quickly so watch it. Depending on how fast your mixer is, the time could vary.

Once the outside of your mixing bowl has mostly cooled and your mixture is thick & glossy, pour it into the prepared baking dish. It should POUR or fall with grace. If you have over mixed it then it will harden pretty fast.

DON’T WORRY — it’s not too late to fix your marshmallows if they have hardened too fast. If you’re using a glass mixing bowl, pop it in the microwave (something I don’t normally use or recommend ever) and cook it for about 10 seconds. This should loosen it up enough to pour into your baking dish.

Sprinkle about ½ tbsp arrowroot starch on top (optional).

Allow marshmallows to sit for at least 35-40 minutes at room temperature.

Remove marshmallows from the dish by lifting the parchment. Place on a cutting board and using a sharp knife, cut into desired shapes and sizes. Toss them in a bowl with remaining ½tbsp arrowroot starch so that each side is coated. This will prevent them from sticking.

Store in a mason jar in a dark, cool place for up to 7 days.

~ Krysten’s Kitchen

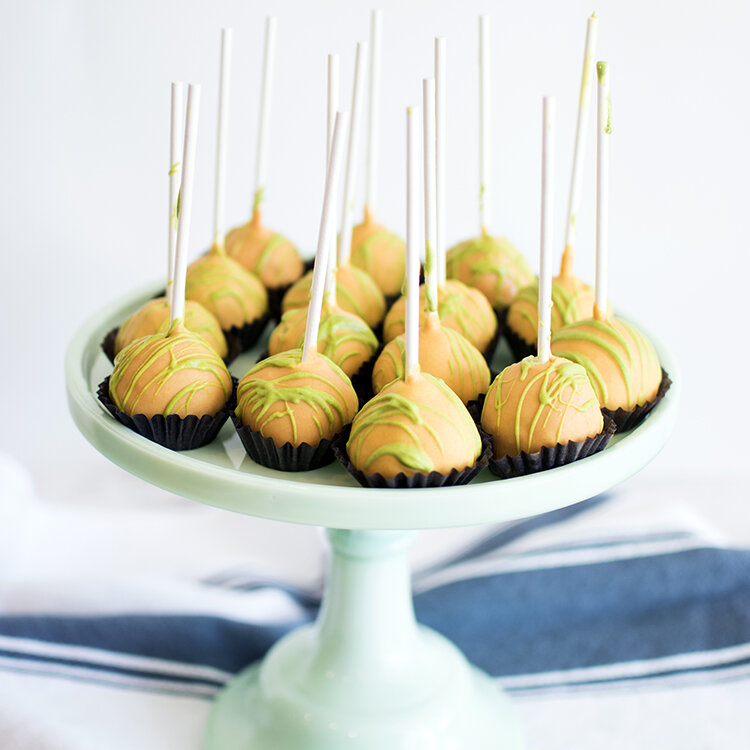
Pumpkin Spice Cake Pops | Natural

Pumpkin_CakePop_square.jpg

Starbucks may have famed this trendy treat, but there is nothing like a homemade version with safe ingredients!

MAKES: 3 DOZEN

INGREDIENTS

CAKE

1 stick (113 g) organic butter, softened
113 g organic sugar
57 g organic dark brown sugar
1 tsp organic vanilla extract
85 g organic pumpkin
2 organic large eggs eggs
½ cup organic milk
198 g. all natural cake flour
1 ½ tsp organic cinnamon
1 tsp organic ginger
1 tsp organic cloves
½ tsp organic nutmeg
½ tsp baking powder
½ tsp sea salt

FROSTING

1 stick (113 g) organic butter, softened
227 g organic powdered sugar, sifted
1 tsp organic vanilla extract
1-2 tsp organic milk

COATING

567 g (20 oz) organic white chocolate, chopped
2 Orange Color Kitchen Color packets

142 g (5 oz.) organic white chocolate, chopped
1 Green Color Kitchen Color packet


DIRECTIONS

Preheat oven to 350 degrees.

In the bowl of your stand mixer fitted with paddle attachment, add the butter, sugar, dark brown sugar and vanilla extract. Mix on low until combined and there are no butter chunks.

Add the eggs and pumpkin and mix just slightly.

In a separate bowl, add the cake flour, cinnamon, ginger, cloves, nutmeg, baking powder and sea salt and whisk together.

Add the milk and flour mixture to the mixing bowl and mix on low until combined into a smooth batter.

You can bake the cakes in either cupcake pans or in cake pans, whichever you choose. It doesn’t matter because you’re going to crush it all up later anyways! If using cupcake pans, line them and fill three-quarters full. If using cake pans, use three 6” pans and line them with parchment paper.

Bake for 17 minutes or until a wooden pick inserted in center comes out clean.

Once the cakes have cooled, remove from pans or cupcake liners and crush with your hands into a large bowl.

In the bowl of your stand mixer fitted with paddle attachment, start the frosting. Add the butter, powdered sugar, vanilla extract and milk.

Dump the frosting into the bowl with the cake and crush together with your hands. You don’t wan to do this in a mixer because it will over mix.

Once the frosting and cake is fully combined, form cake balls and place on a baking sheet with parchment paper.

Place the baking sheet in the freezer.

In a double boiler, melt the 567 g. white chocolate. Dip the ends of the sticks into the white chocolate, then stick into the cake balls. Place back in the freezer for 5-10 minutes. This will keep the stick from coming out when you dip the cake pops.

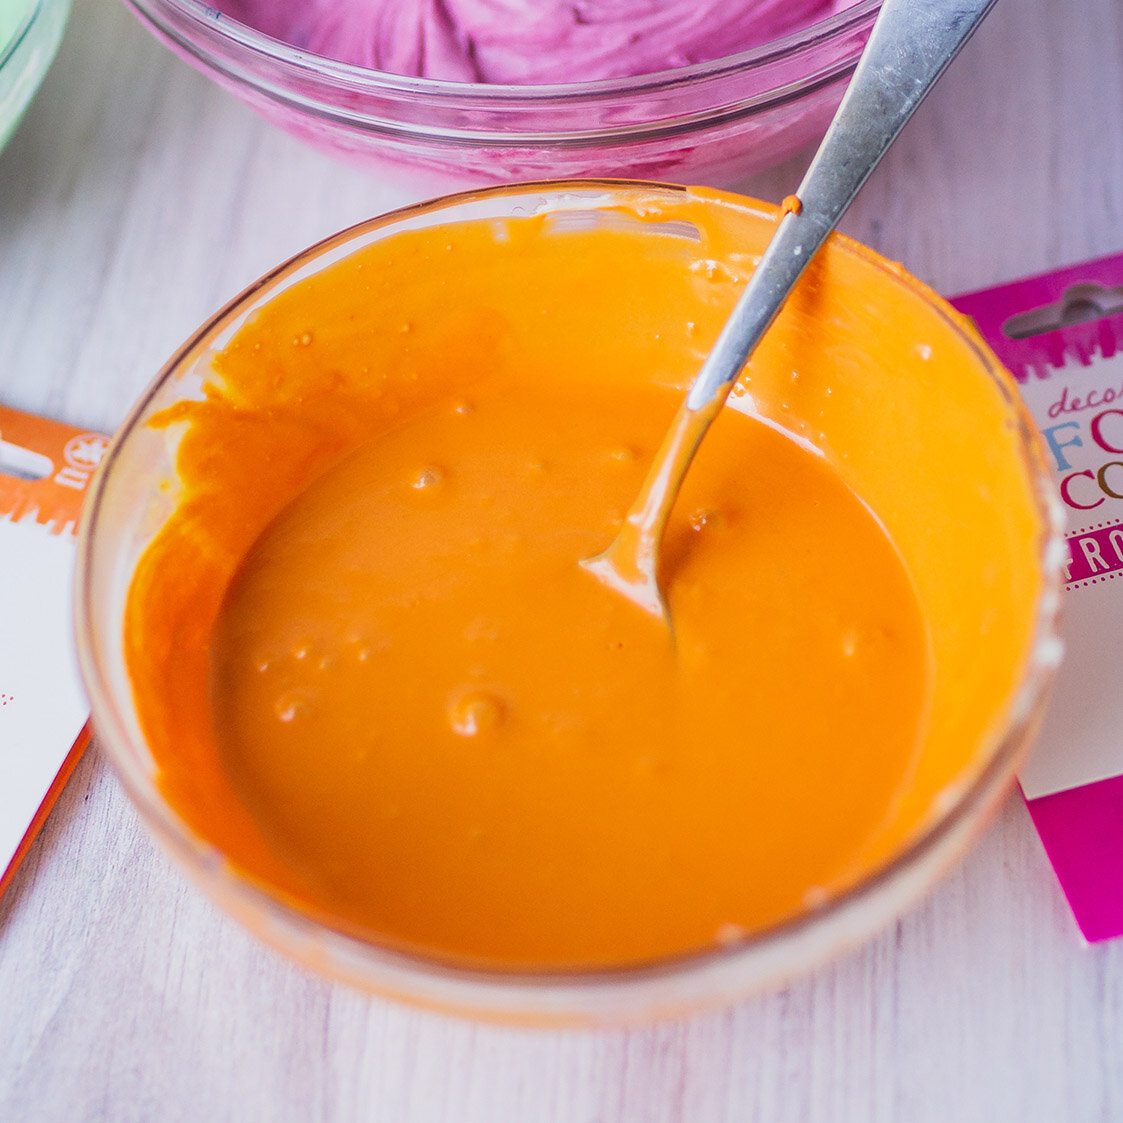
Add the orange dye to the white chocolate and stir to combine completely.

Remove cake pops from freezer and coat in orange chocolate. Place back on parchment paper.

Once all the cake pops are covered in orange chocolate, place them back in the freezer.

In a double boiler, melt the remaining white chocolate. Once completely melted, add the green dye and stir to combine completely.

Using a spatula or even a spoon, drizzle the green chocolate over the cake pops.
Store in the fridge.

~ Recipe by Mimi's Cookie Bar

Pumpkin Cake Pops by ColorKitchen, made using all natural food dyes!

Pumpkin Cardamom Spice Ice Cream | Natural | Dye-free

PumpkinSpiceIceCream_web.jpg

A delicious no-churn ice cream recipe anyone can make, embellished with dark chocolate and fall pumpkin seeds.

MAKES: ½ gallon ice cream

INGREDIENTS

2 cups heavy cream
2 tsp vanilla extract
1 tsp orange flavor
½ tsp cinnamon
¼ tsp cardamom
½ cup organic sugar
1 cup dark chocolate shavings
1 Pink Color Kitchen Color packet
1 Yellow Color Kitchen Color packet

DIRECTIONS

With a hand or standing mixer, combine all ingredients

but chocolate and pumpkin seeds.

Whip until color fully blended and stiff peaks form.

Pour into cake pan or 2 bread loafs.

Stir in chocolate shavings.

Top with pumpkin seeds.

Cover and put in freezer overnight.

Let thaw 10-15 min before serving.

Enjoy!

Cardamom_Pumpkin_Spice_Ice_Cream.jpg

Candy Corn Chocolate Cake | Gluten-free

CandyCorn_web.jpg

This Halloween enjoy a different kind of Candy Corn in the form of a delicious cake!

MAKES: One 9” Cake

INGREDIENTS

1 bag Pamela’s Gluten-Free Chocolate Cake mIx
1 pint Wholesome Organic Vanilla Frosting
1 Orange Color Kitchen Color packet
1 Yellow Color Kitchen Color packet

DIRECTIONS

Follow the directions on the back of the cake mix and pour into 9” cake pan.

Once the cake is cooled, remove from pan and plate.

Divide frosting into three bowls. Add ¼ cup plain white frosting into first bowl and set aside.

In second bowl, add ColorKitchen Yellow packet and stir in ¼ tsp water to make a paste. Add ½ cup frosting and blend with a hand mixer with 1 beater attached until color fully blended.

In third bowl, add ColorKitchen Orange packet and stir in ¼ tsp water to make a paste. Add 1 cup frosting and blend with a hand mixer with 1 beater attached until color fully blended.

Take frosting knife and frost center circle of cake with white frosting 3” in diameter. Around white circle add larger yellow frosting circle about 3” in diameter. Complete frosting with outer circle of orange, to the edge of the cake. Frost sides of cake with remaining frosting.

Cut cake to make candy corn slices and enjoy!

Near-Naked Pumpkin Drip Cake

cake_color.jpg

Put Starbucks to shame with this pumpkin cake that is dye free and delicious!

INGREDIENTS

PUMPKIN CAKE
3 large eggs
16 oz can pumpkin
¾ cup vegetable oil
1 tsp vanilla extract
1 cup granulated sugar
1 cup dark brown sugar
2 ½ cups all-purpose flour
1 tsp baking powder
1 tsp baking soda
1 tsp salt
1 tbsp pumpkin pie spice

CREAM CHEESE FROSTING
8oz package cream cheese
1 cup unsalted butter
4 cups powdered sugar
1 tsp vanilla extract

 ORANGE GANACHE DRIP
1 cup white candy melts
¼ cup heavy cream
½ tsp Orange Color Kitchen Color
1 pinch Red Velvet Color Kitchen Color

DIRECTIONS

CAKE
1Preheat oven to 350. Line bottoms of two round baking pans with parchment paper rounds and coat sides with cooking spray. Batter fits in two 6” by 3” pans or two 8” by 2” pans.

Combine wet ingredients in a mixing bowl and whisk to combine. Add dry ingredients and whisk until flour is incorporated. Pour half the batter in each pan and bake at 350 for 30 minutes, or until toothpick inserted in center comes out clean. Let cakes cool fully before frosting.

FROSTING
Beat cream cheese and butter until smooth. Add powdered sugar and vanilla and continue to mix until smooth and slightly fluffy.

GANACHE
Melt the white chips with the cream in the microwave and mix until smooth. Add the color powder straight to the ganache and stir with a whisk until evenly blended, then pour mixture into a piping bag or plastic baggie.

ganache_cake_color.jpg

ASSEMBLY

Before assembling the cake, level each layer by slicing off the rounded top.

Once cakes are level they can be stacked and frosted. To achieve the semi-naked look, use a bench scraper or flat spatula to scrape the exterior frosting to the desired thickness. A turntable is helpful to turn the cake as you scrape. When the sides are smooth, use a clean bench scraper or spatula to drag the messy edges into the center of the cake and achieve a sharper edge.

Pipe the warm ganache around the top rim of the cake and let it drip down the sides, then fill in the top.

Finally, use a large star tip and leftover cream cheese frosting to pipe rosettes around the top edge.


~Recipe-Anna Dunn

nude_cake.jpg

Pumpkin Spice Cake: Hand Painted with Fall Leaves

watercolor frosting pumpkin cake

MAKES: one 9” cake

INGREDIENTS

CAKE
½ cup unsalted butter, room temperature
1 ¼ cups firmly packed light brown sugar
2 large eggs, room temperature
1 cup pure canned pumpkin puree
1 tsp pure vanilla extract
2 cups sifted cake flour
¼ tsp baking powder
1 tsp baking soda
¼ tsp salt
½ tsp ground cinnamon
¼ tsp ground ginger
⅛ tsp ground cloves
½ cup buttermilk, room temperature

DIRECTIONS

Preheat the oven to 350 degrees F. Butter, or lightly spray with a non-stick vegetable spray, two - 8 inch (20 cm) cake pans. Then line the bottom of each pan with a round of parchment paper.

In the bowl of your electric mixer (or with a hand mixer), beat the butter and sugar until light and fluffy (about 3 minutes). Add the eggs, one at a time, mixing well after each addition. Scrape down the sides of the bowl as needed. Add the pumpkin puree and vanilla extract and beat until incorporated (the batter will look curdled).

In a separate bowl, whisk together the flour, baking soda, baking powder, salt and spices. Add the flour mixture and buttermilk alternately to the batter, in three additions, beginning and ending with the flour mixture. Evenly divide the batter between your two pans. Bake for approximately 25 minutes, or until a toothpick inserted in the center of the cake just comes out clean. Cool on a wire rack for 10 minutes and then invert and remove the cakes from their pans. Cool completely before frosting.

INGREDEINTS

CREAM CHEESE FROSTING
8 ounces full fat cream cheese, room temperature
¼ cup butter, room temperature
1 ½ tbsp pure maple syrup
3 cups confectioners' (powdered or icing) sugar, sifted

Place the cream cheese and butter in the bowl of your electric mixer, fitted with the paddle attachment (or use a hand mixer) and beat until smooth. Add the maple syrup and confectioners' sugar and beat until light and creamy and of spreading consistency. Add more sugar or maple syrup if needed.

ROYAL ICING
1 egg white
1 lb powdered sugar
½ teaspoon lemon juice
Color Kitchen Color Packets

Using a stand mixer, combine the egg white and lemon juice. Add some of the sifted powdered sugar and start the mixer on low. Keep adding sugar until the icing is a white, smooth, runny consistency. If it gets too thick add a tiny bit of water. If it gets too runny add a little sugar. We left our royal icing white to create a blank canvas on the cake but if you would like to have a colored background go ahead and color the royal icing by mixing a little Color Kitchen Color Packets with a little glycerin or water to make a smooth paste. Then add a little colored paste to the royal icing. Once icing is done keep it covered tightly with plastic so it won't dry out.

watercolor frosting technique

ASSEMBLY

Place one of the cake layers on your serving plate. Frost with a layer of icing. Place the second cake on top of the first layer and frost the top and sides of the cake. Make the top as absolutely flat as you can. Using a piping bag, pipe a border around the top edge of the cake. Refrigerate cake till completely cold. Once the cake is cold pour a thin layer of the royal icing over the entire top of the cake. Let it sit at room temp until the royal icing is dry to the touch. This could take a few hours. Once the royal icing is dry, it is ready to be painted. Mix an assortment of Color Kitchen Color Packets in little bowls with a tiny bit of water. Mix until smooth and runny. We used yellow, red, green and a mix of all three to make a darker brownish green color. Using clean paintbrushes begin painting your cake in any way you like!

The cake can be chilled for a day, but overnight and the royal icing will begin to soften in the condensation. It won't ruin your cake but it will change the look slightly. Take your cake out of the fridge to warm up a bit before serving. 

- Recipe by chef Rose Archer

Flower Crown Pumpkin Cookies

Hipster Pumpkin Cookies

Your spooky season just got a whole lot sweeter with these pumpkin cookies! They’re to dye for!

MAKES: 2 dozen cookies

INGREDIENTS

COOKIES
1 stick (113 g.) organic butter, softened
170 g organic sugar (¾ cup)
1 tsp organic vanilla extract
2 organic large eggs
198 g organic flour (1 ¼ cup + 2 T.)
43 g organic Dutch cocoa, sifted (½ cup + 2 T.)
1 ½ tsp baking powder
½ tsp sea salt

ORANGE FROSTING
1.5 sticks (170g) organic butter, softened
340 g organic powdered sugar, sifted (2 ½ cups)
1 tsp organic vanilla extract
4 tsp (2 packets) Orange Color Kitchen Color
2-3 tsp. water

DECORATING FROSTING
½ stick (57 g) organic butter, softened
170 g organic powdered sugar, sifted (1 cup + 3 T.)
Green, Blue & Pink Color Kitchen Color packets

TOOLS
Rolling pin
3” round cookie cutter
3 piping bags
Ateco decorating tips #56, 15, 26, 68, 263
1 coupler

Flower Pumpkin Cookies

DIRECTIONS

Preheat oven to 350 degrees.

In the bowl of your stand mixer fitted with paddle attachment, add the butter, sugar and vanilla extract. Mix on low until all ingredients are combined.

Add the eggs and mix just slightly.

In a separate bowl, add the flour, cocoa, baking powder and sea salt and whisk together.
Add the flour mixture into the mixing bowl and mix on low until cookie dough forms.

On a floured surface, roll out cookie dough to about ¼” thick.

Using a 3” round cookie cutter, cut out cookies and place on a cookie sheet with parchment paper. Place at least 1” apart.

Bake for 10-11 minutes.

Once the cookies have cooled start the Orange Frosting. In the bowl of your stand mixer fitted with paddle attachment, add the orange dye and 1-2 tsp. water. Just using a spoon or small spatula mix together to make the orange dye. Then add the butter, powdered sugar and vanilla extract and mix on low until combined. Then speed mixer up to high for 1 minute or until light and fluffy. Add a little more water if needed.

Put the orange frosting in a piping bag with a coupler and decorating tip #56 first. Pipe the outline of the pumpkin onto the cookies.

Then switch out the tip to #15 and fill in the pumpkins.

Next make the decorating frosting. In the bowl of your stand mixer fitted with paddle attachment add the butter, powdered sugar and 1 tsp. water. Mix on low until all ingredients are combined then speed mixer up to high for 1 minute or until light and fluffy.

In a separate bowl add ½ tsp. ColorKitchen Pink Dye and ½ tsp. ColorKitchen Blue dye with 1 tsp. water to make the dark purple.

In another bowl, add ½ tsp. ColorKitchen Green Dye and ½ tsp. water to make the green dye.

You will separate the frosting into those two bowls, adding more into the purple, less into the green and leaving a very small amount in the mixing bowl. Stir the purple and green frosting to combine completely. When the green frosting is completely combined, add a small dollop into the mixing bowl with the white frosting. This will make a light green or mint colored frosting.

Put the purple frosting in a piping bag with decorating tip #26. Put the green frosting in a piping bag with decorating tip #68 and the mint in a piping bag with decorating tip #263.

Pipe one or two roses on top of the pumpkins with purple frosting.

Then pipe leaves around with the green and mint.

Store in the fridge or in an airtight container. 

~Recipe by Mimi's Cookie Bar